1. What is a Favicon
A HTML Favicon (short for “favorite icon”) is a small, iconic image that represents a website or web page. It is displayed in various places by web browsers, such as:
- Browser Tabs: The small icon next to the page title in the browser tab.
- Address Bar: The icon displayed in the address bar of the browser.
- Bookmarks: The icon shown next to the website name in bookmarks or favorites.
- History: The icon displayed in the browser’s history list.
- Search Results: Some search engines display the favicon next to the website’s URL in search results.
Favicons are typically square images, with common sizes being 16×16 pixels, 32×32 pixels, or 64×64 pixels. They are usually saved in .ico format, but modern browsers also support other formats like .png, .gif, and .svg.
2. Why Use a Favicon
- Branding: A favicon helps reinforce your brand identity by displaying your logo or a recognizable symbol.
- Professionalism: Websites with favicons appear more polished and professional.
- User Experience: Favicons make it easier for users to identify and locate your website in their browser tabs or bookmarks.
- SEO Benefits: While favicons themselves don’t directly impact SEO, they improve user experience, which can indirectly benefit your site’s ranking.
3. How to Create a Favicon
Design the Icon:
- Use graphic design tools like Adobe Photoshop, Illustrator, Canva, or free online tools like Favicon Generator.
- Keep the design simple and recognizable, as it will be displayed at a very small size.
- Save the image in a square format (e.g., 16×16, 32×32, or 64×64 pixels).
Convert to Favicon Format:
- If your image is not already in
.icoformat, use an online converter like Favicon.cc or RealFaviconGenerator. - These tools can also generate favicons in multiple sizes and formats for better compatibility.
Save the Favicon:
- Save the favicon file as
favicon.ico(or another name if using a different format). - Place it in the root directory of your website or in a dedicated folder (e.g.,
imagesorassets).
4. How to Add a Favicon to Your Website
To add a favicon to your website, you need to include a <link> tag in the <head> section of your HTML document. Here’s how:
Basic HTML Code for Favicon:
<!DOCTYPE html>
<html lang="en">
<head>
    <meta charset="UTF-8">
    <meta name="viewport" content="width=device-width, initial-scale=1.0">
    <title>My Blog</title>
    <!-- Favicon link -->
    <link rel="icon" type="image/x-icon" href="/path/to/favicon.ico">
</head>
<body>
    <h1>Welcome to My Blog</h1>
    <p>This is an example of a blog with a favicon.</p>
</body>
</html>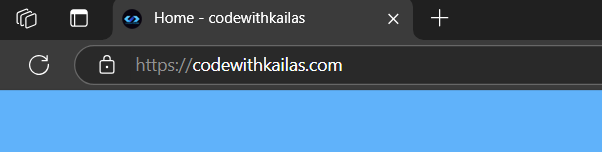
Explanation of the <link> Tag
rel="icon": Specifies the relationship between the current document and the linked resource (in this case, the favicon).type="image/x-icon": Specifies the MIME type of the favicon. For.icofiles, useimage/x-icon. For other formats:- PNG:
type="image/png" - SVG:
type="image/svg+xml" - GIF:
type="image/gif" href="/path/to/favicon.ico": Specifies the path to the favicon file. Adjust the path based on where your favicon is located.
5. Favicon Formats and Browser Compatibility
Modern browsers support multiple favicon formats. Here’s a breakdown:
.ico:
- The most widely supported format.
- Can contain multiple sizes (e.g., 16×16, 32×32) in a single file.
.png:
- Higher quality than
.ico. - Supported by most modern browsers.
.svg:
- Scalable Vector Graphics format.
- Ideal for high-resolution displays.
- Supported by modern browsers but not universally.
.gif:
- Rarely used for favicons.
- Supported but not recommended due to limited quality.
6. Advanced Favicon Implementation
For better compatibility across devices and browsers, you can include multiple versions of your favicon. Here’s an example:
<!-- Default favicon -->
<link rel="icon" type="image/x-icon" href="/path/to/favicon.ico">

<!-- PNG favicons for different sizes -->
<link rel="icon" type="image/png" sizes="32x32" href="/path/to/favicon-32x32.png">
<link rel="icon" type="image/png" sizes="16x16" href="/path/to/favicon-16x16.png">

<!-- Apple Touch Icon (for iOS devices) -->
<link rel="apple-touch-icon" sizes="180x180" href="/path/to/apple-touch-icon.png">

<!-- SVG favicon -->
<link rel="icon" type="image/svg+xml" href="/path/to/favicon.svg">Explanation
- Multiple Sizes: Different sizes ensure the favicon looks good on various devices and resolutions.
- Apple Touch Icon: Used for iOS devices when users add your website to their home screen.
- SVG Favicon: Provides a high-quality, scalable option for modern browsers.
7. Testing Your Favicon
After adding the favicon to your website:
- Open your website in different browsers (e.g., Chrome, Firefox, Safari, Edge).
- Check if the favicon appears in the browser tab, address bar, and bookmarks.
- Test on different devices (desktop, mobile, tablet) to ensure compatibility.
8. Common Issues and Troubleshooting
Favicon Not Displaying:
- Ensure the
<link>tag is placed correctly in the<head>section. - Verify the file path in the
hrefattribute is correct. - Clear your browser cache and reload the page.
Low-Quality Favicon:
- Use a high-resolution image when creating the favicon.
- Avoid complex designs that may lose detail when scaled down.
Browser-Specific Issues:
- Some older browsers may not support newer formats like
.svg. Always include a fallback.icofile.
Conclusion
A favicon is a small but essential element of your website’s design. It enhances branding, improves user experience, and adds a professional touch to your site. By following the steps outlined in this guide, you can easily create and implement a favicon for your blog or website.